Saturday 12 November 2016

Cheddar Scones

Sharing. It is one of the key components of being a parent, and it does not come easily to my when I am at my most gluttonous. But I have a secret weapon, and it is cheese.

Yes, cheese. Isn't it a miracle that curdled, rotten milk can be made into something so glorious? Christmas is coming, so cheddar, camembert, and stilton are everywhere, and that is a wonderful thing. Unless you are my eldest son, who, for reasons unbeknownst to me, has no appetite for the stuff. None. In fact, if he tastes cheese, he suffers a gag reflex, which is just great at parties, let me tell you. So while other families put cheese on and in food in order to entice their children to eat it, I must do the opposite. But you see, I can also flip it round: if I want something ALL TO MYSELF, I can just add cheese! Once his siblings see his reaction, they often follow suit in food refusal, meaning I get whatever it is all to myself, and I don't have to hide in the cupboard to eat it either.

And recently I have developed a slight addiction to cheese scones.

Whenever I can, I escape our flat to get some study time sans enfants, and the place I usual go is a hipster type farmshop plus cafe located 10 minutes walk from our place. And the best time to go is the first hour they are open in the morning. Why? Because that is when the scones come out of the oven. I don't even bother checking what kind are being offered anymore (they offer one sweet and one savoury kind each day, and there is no routine to them), so I just ask for a savoury one and wait patiently for the piece of art to appear. The scone arrives steaming on the table, hot to the touch, meaning the butter melts and soaks into every nook and cranny. Heaven, I tell you. And highly addictive.

So I thought I'd try and recreate some of the magic at home. I haven't quite moved up to the artisan level of their creations, but it was still pretty awesome, and NO ONE ELSE WANTED ANY!! Which meant I could eat one and freeze the other three for future self indulgence.

Ok, freeze two. They were really good.


Cheese on top and cheese within
My 4 babies

Butter makes it better

Here's the recipe I tried, with more milk than it says. Still needs tweaking, and I think I may add some seeds for crunch next time...

Ingredients: 
225g self raising flour 
Pinch salt 
Pinch cayenne pepper 
1 tsp baking powder 
55g butter 
100g cheddar cheese 
80­-90 ml milk, plus extra for glazing 
Extra cheese for topping the scones

Method Preheat oven with the baking tray inside to 200.C (slightly less for fan ovens). In a medium­large bowl sift together the flour, salt, cayenne pepper and baking powder. Sift again to make sure the ingredients are thoroughly combined. 
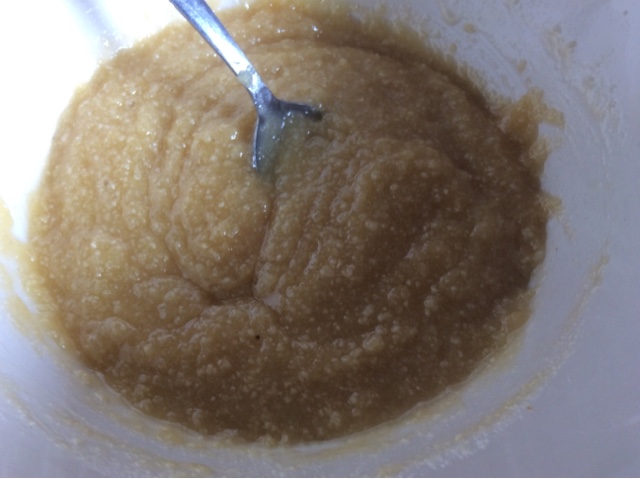
Cut the butter into cubes, place in the bowl and then mix with your fingertips to make breadcrumbs. Sprinkle the grated cheese into the breadcrumb mixture and rub in until the cheese is evenly distributed. Try not to mix too much as the heat from your hands may start to melt the cheese. Make a well in the centre of the mixture and pour in enough milk to give a fairly soft but firm dough. Do not pour in all the milk at once as you may not need it all to get the right consistency. Lightly flour a surface and roll out the dough to approximately 2cm thick. Cut out the scones with a medium cutter and then place on the hot oven tray. Glaze the tops with the extra milk and sprinkle a little cheese on the top of each scone before putting in the oven. Bake in the oven for 10­-15min

Sunday 30 October 2016

Auntie Jennifen's Chocolate Cake


School holidays, that time of year when you slow down, relax, eat healthy, and accomplish great things.

HA! Just kidding.

You hire a cheap, duct taped car, drive a distance to go and see lots of family members (and some breathtaking scenery), then stuff your face every half hour all day, every day. You get nothing productive done, and then wonder why your clothes feel all tight and you are behind on your studies...

But it's worth it because you get to taste some pretty amazing chocolate cake - not too rich, just the right amount of chocolate, and, er, MOIST! And handily, your sister-in-law not only HAS the recipe, she is willing to share it.

Now, you don't just make this cake on any old kind of day. No, you wait for one of those days when you are running late to pick up your youngest child, after which you need to go and pick up your other two, and you head into the shops to make sure you have lunch and other bits and bobs needed and you get to the self scanning till and realise...you don't actually have your purse with you. You know exactly where it is, now that you think about it (note: never change bags, ever) but that isn't going to help you pay for the basket of shopping that you don't have time to come back and get later. One of those days where you also find out the school has planned the individual photo portraits for Hallowe'en, and that happens to be when your son's class will be skiing for half the day, and your daughter's class is having a costume party. One of those days when you work for a ghost tour company and things are going a bit mental. This is the perfect sort of day to make a chocolate cake.

So yes, after children were collected and fed (eventually) I gathered ingredients together and started throwing them into a bowl.


Bubble, bubble, toil, and trouble...

And I began to mix.


Then I poured in boiling water and mixed some more.


Until I had this beautiful, runny batter in front of me.


Funnily enough, some people arrived to help me with it.

My daughter's top is great for hiding stains, I was relieved to discover

It was poured into two tins, in uneven quantities, naturally, and then they grew to unnatural sizes.

And, because I am such a skilled baker, they sank a bit.


I stuck them in the fridge to cool quickly, then moved onto the icing, beginning with butter, cocoa, and espresso powder, then getting ready to add icing sugar and milk until the final product was ready.


Then I had one of my special moments. You know, one of those special times when you have three people in the kitchen talking to you at once, and you just mean to bend down to dive under the mixer's wire extended across the not-so-greatly designed kitchen to get to the fridge for the milk, only you misjudge the distance and bash your head so hard on a corner that blood starts pouring down your face? And your husband asks you what's wrong with you as you sit crying on the floor with your three year old handing you tissues "for your drips"?

Does that happen to you, too?

Looks like I'll be Harry Potter for Hallowe'en. This is the cut cleaned up and swelling subsided:


Not to be deterred, I had my assistant hold the bowl while I applied pressure (and an ice pack) to the wound so I could keep mixing. What else was I to do? Give up on a cake? Pfft, I DON'T THINK SO!


If there was any time chocolate cake was needed, now was the moment.


My precious...


After my family had sampled it

The rest was sent along to the lovely folk at work who are keeping folk entertained this weekend as part of Hallowe'en celebrations. The cake was not given out of any real generosity on my part, you understand, but instead to prevent me from sobbing and eating all of it in one sitting.

If you find you are having the sort of day requiring this cake you can get a pretty and printable version of the recipe here, or you can settle for the usual copy & paste below.

Ingredients
Instructions
  1. Preheat oven to 350ยบ F. Prepare two 9-inch cake pans by spraying with baking spray or buttering and lightly flouring.
  2. For the cake:
  3. Add flour, sugar, cocoa, baking powder, baking soda, salt and espresso powder to a large bowl or the bowl of a stand mixer. Whisk through to combine or, using your paddle attachment, stir through flour mixture until combined well.
  4. Add milk, vegetable oil, eggs, and vanilla to flour mixture and mix together on medium speed until well combined. Reduce speed and carefully add boiling water to the cake batter. Beat on high speed for about 1 minute to add air to the batter.
  5. Distribute cake batter evenly between the two prepared cake pans. Bake for 30-35 minutes, until a toothpick or cake tester inserted in the center comes out clean.
  6. Remove from the oven and allow to cool for about 10 minutes, remove from the pan and cool completely.
  7. Frost cake with Chocolate Buttercream Frosting.
Frosting:

Ingredients
  • 1½ cups butter (3 sticks), softened
  • 1 cup unsweetened cocoa
  • 5 cups confectioner’s sugar
  • ½ cup milk
  • 2 teaspoons vanilla extract
  • ½ teaspoon espresso powder
Instructions
  1. Add cocoa to a large bowl or bowl of stand mixer. Whisk through to remove any lumps.
  2. Cream together butter and cocoa powder until well-combined.
  3. Add sugar and milk to cocoa mixture by adding 1 cup of sugar followed by about a tablespoon of milk. After each addition has been combined, turn mixer onto a high speed for about a minute. Repeat until all sugar and milk have been added.
  4. Add vanilla extract and espresso powder and combine well.
  5. If frosting appears too dry, add more milk, a tablespoon at a time until it reaches the right consistency. If it appears to wet and does not hold its form, add more confectioner’s sugar, a tablespoon at a time until it reaches the right consistency.

Sunday 16 October 2016

Apple Coffee Cake


October break is here, and with it, a blog post for the first time in a while cause, you know, life.

In the USA, October break means nothing. There, children are pushed out of public schools for three months of summer to wreak havoc, then once they have finally forgotten everything their teachers laboured to insert into their resistant craniums, they are locked back inside the institution's doors for the remainder of the year (apart from two weeks at Christmas and a week in spring). Meanwhile, here in Britain one must always check one's calendar to see if school is on that day, for the schools don't open their doors for such significant cultural events as the following:

Christmas
Easter
Autumn*
February*
and...the ever significant, can't ever miss it:
Bank holiday

I say bank holiday, singular, but it feels like there are dozens of the bastards, usually falling on Mondays, which usually have no great significance other than to say "feck it, let's have a day off, just to mess with the parents looking forward to Monday, shall we?"

The consequence of this schedule is that you'll be rolling along, enjoying your little school routine of drop-offs, pick-ups, working when they are at school, when all of a sudden the school refuses to take them for a day, a week, or, if you're really lucky, the school announces that technically the inner walls aren't attached to the outer walls and the roof isn't technically attached to the walls either so they have to close indefinitely.

I really, really hate it when they do that last one, by the way.

So here we are, celebrating autumn. And Autumn means apples, apples stolen in the black of night from the local angry farmer who came after us with his pitchfork.** They taste best poached, but a close second is to make apple coffee cake. At this point, Americans all say "oooh- coffee cake! and Brits all say "apple and coffee? In a cake? uh...<tentative bite> wow, I can't taste the coffee at all!" That's because it is a cake meant to be consumed with coffee, it doesn't actually contain any. I had been told it was a German thing to call it coffee cake, then I spoke to my German colleagues all chill about "coffee cake" and how it doesn't have any coffee in it and they stared in that special, direct, mean-what-they-say that their nation has perfected and said "no, we do not call that coffee cake in Germany" so I guess it's just another silly Americanism.


You know how a lot of the time I take photos of all the steps along the way? Screw that, here are some apples on some batter that I made. Incidentally, one of the great things about having kids is that first thing in the morning you can send them to the shops for ingredients.

Son, I couldn't have made this without you. 

I sliced the apples instead of roughly chopping them cause I felt fancy, but I didn't make them uniform, because I lack both the precision and the will to do that. 

This is the struesel topping I made in the food processor. I should have made more. Too much topping is always better than too little.


Here is the evidence that I should have made more - you can never have too much struesel on coffee cake.
unbaked


Baked. Yes, I know I missed a spot.

And here is the final, somewhat thin for coffee cake, product, right before I stuck it in the freezer with all of its attractive brothers and sisters (as well as the ugly brother who has the same mother and father but somehow lost out on the looks lottery) so that I can better transport the goods to a mystery location tomorrow. And so I didn't shove all the cake in my face immediately, because these guys are like Pringles. 

Soft cake base, gooey, tart apple middle, and crunchy top
So wish me luck over the next week as I try to master the fine details of financial reporting (INCLUDING the ever exciting group reports pro formas) while at the same time keeping three children fed, clothed, and entertained with all kinds of educational activities. 

HA HA HA HA!!

Please pass me the cake now.

I can't find a handy link for the recipe, so forgive me if I leave that typing for another day. Alternatively, open up a copy of Joy of Cooking and make their Sour Cream Coffee Cake with Apple topping, using yogurt instead of sour cream and Struesel I. 


*They don't shut for the entirety of Autumn of February, as that would be silly. Instead each time children are given a week off. Plus, usually, a random Monday added on just to mess with you. 

**the apples weren't actually stolen - my colleague has an apple tree and gifted them to me. 


Monday 30 May 2016

Ginger and Date Scones


Scone. How do you pronounce that word? Here, it is generally said to be "skon", unless you are talking about the place itself, in which case it is "Skoon". If you are reading this in North America, you probably think it rhymes with stone. 

No, it doesn't. Stop doing that. 

Scones (especially their pronunciation) have been a bit of a thing for a long time in our family. My grandmother's consistently rose like clouds when she cooked them at home in Australia. Unfortunately, when she tried the exact same recipe in North America, the flour produced hot, buttery batches of rocks - fresh baked disappointment - due to the local flour's refusal to cooperate. But the British delicacy didn't have to be homemade; every time we went on a trip to the beach town of Lorne, we could count on visiting the same tea shop overlooking the ocean.  There my grandmother would carefully scrutinise all the menu choices before choosing the same thing time and time again: a cream tea. I think she was of the jam then cream school, but I won't swear to it.

We made the odd batch of scones at home growing up using the ever reliable Bisquick, but it wasn't until I moved to Scotland that I made them from scratch. Here, so many claim to make the BEST scones that I was a bit wary of trying to make them myself. Eventually I conquered my fear, telling myself  at the end of the day, anything straight out of the oven served smeared with melting butter and generous dollops of jam is going to be good, no matter how incompetent a cook you are.

A few years ago my mum went on a visit to Australia and raved about a particular variety of scone: ginger and date. She feasted on them several times during her stay, and being somewhat of a ginger fanatic, recommended I also try making them. She suggested this on a regular basis for quite some time...

"So, have you tried making ginger and date scones?"
"I miss those scones in Australia...you know, the ginger and date ones? Have you made them?"
"Did you find a good recipe for ginger and date scones yet??"
"Oh...you're baking? Are you making scones? With ginger? And dates?"

Still, I can't say I was ever really tempted to make them until this past week. I was at home, awaiting her and her companion's arrival while looking after a poorly 3-year-old, trying to think of something simple I could make with the ingredients I had on hand. Years ago, my mother and I had walked the West Highland Way together, and she had been particularly delighted by Rose Cottage, a B&B that had greeted us with fresh scones and a pot of tea. I looked to recreate that moment (scones after a trek across the ocean rather than following a 14 mile stroll) and then realised that I had both candied ginger and dates in my possession, so perhaps it was time to try the variety my mother had requested I try so many times. The one ingredient in the recipe I did not possess was buttermilk, but that was easily remedied by adding lemon juice to milk and waiting for the mixture to magically transform. 

The rest was just as simple: dry ingredients and chopped butter into the food processor, blitz, dump into bowl & add buttermilk to bring together, mixing as little as possible, fold in dates and chopped ginger. Put mounds onto greaseproof paper, then sprinkle coarse, demerara sugar on top and bake until nicely browned. Brew tea and wait for mother, trying one for quality control while waiting. 

So yes, mother, I have made them. And yes, they were nice. Thank you.

The link is here, but the recipe is also below:

INGREDIENTS

    • 2 1/4 cups all-purpose flour
    • 1/4 cup brown sugar, packed
    • 1 1/2 teaspoons baking powder
    • 1/2 teaspoon baking soda
    • 1/4 teaspoon salt
    • 1/2 cup unsalted butter, cold, cut into 8 chunks
    • 1 cup buttermilk (just under a cup of milk, add a Tbsp of lemon juice, stir, then let sit for 10 minutes)
    • 3/4 cup dates, chopped
    • 1/4 cup crystallized ginger, chopped
    • 1 tablespoon demerara sugar 

DIRECTIONS

  1. Preheat oven to 425 degrees F.
  2. In medium bowl, whisk together flour, sugar, baking powder, baking soda & salt.
  3. With pastry blender cut in the cold butter until mixture looks like fine crumbs (or blitz in a food processor)
  4. Stir in buttermilk until dough forms a ball, then stir in dates & ginger.
  5. On an ungreased baking sheet & using a 1/3 cup measure, drop dough 1 inch apart, then sprinkle with sugar.
  6. Bake 12 to 15 minutes or until golden brown


Saturday 28 May 2016

Bakewell Tart

The panic continues, folks.

BBC Food will be coming to an end, and with it, its searchable index of 11000 recipes, a resource that has been invaluable to me and countless others. Whenever trying something new, it is the first site I tend to go to, as its recipes are reliable, its comments useful.

But it don't make no money, so it gots to go. Before it does, I shall be building up an arsenal of recipes such as the one for this.


Don't be distracted by the stars, it is the tart we made here. This was it competing with another mum's cupcakes for the attention of 8 year old boys. The cupcakes won, dammit. Had it been the Sunday church crowd, it would have been a different story, but this time, I failed miserably in providing the most tempting cake on offer.

As far as tarts go, this one is a pretty simple one. The base pastry is just butter whizzed up in a food processor with flour, plus enough water to bind it together, then rolled out for my removeable base tart tin. Naturally, I made sure it was flawless.


It chilled in the fridge for a while  (to prevent too much shrinkage when baking) then on went some scrunched up baking parchment followed by my baking beans.


Baking parchment always feels to me like the budget cousin of waxed paper. Can you still get that anywhere? I'd like some just for wrapping sandwiches to bring to work, to make it look like I've been to some fancy artesan deli instead of using Lidl's finest pb&j.

Anywhoo, while blind baking the pastry, I put together a mixture that this photo makes look pretty revolting.


It was ground almonds, melted butter, sugar, almond extract and eggs.

The pastry came out, and you can see a wee patch at the lower edge where a hole had appeared.


In went a whole bunch of raspberry jam


Then my youngest son was kind enough to take this "action shot" while I explained that no, we weren't making chocolate chip cookies.


Oh, and this is me. Backlighting is awesome. My hat is so I don't get hair in your cake. You're welcome.


Then on went the almond mixture.


And then sliced almonds were scattered on top.


Back in the oven it went. I have to put it on a tray for 2 reasons:

1) It's a lot easier to put in and out of the oven

2) I always forget it's a removeable base, so inevitably if I DON'T use a tray, I grab the edges, then manage to shove the bottom part of the pan up on one side and not the other, smashing the tart into irrecoverable ugliness. So yeah, use a tray.


You may have noticed I didn't trim the edges earlier. The British Bake off hosts seem to think you should trim the edges after it's cooked, while it's still warm, to prevent the sides sliding into the bottom of the dish. You also can trim it more neatly. I do everything the judges say, so I waited until now to cut off the overhanging pastry.


Ok, so I didn't add a glazed icing to this tart like Mary Berry says you should. I don't think it needs it. It looks pretty enough as it is, here seen in its vintage yellow tupperware to be safe on its mile long journey.


And here, sliced on site next to WAY popular star buns. Oh well, at least I brought it on the right day this time.


The link to the recipe (while it still exists) is here, otherwise you'll find my usual styling genius of copy and paste with the original recipe below:


Ingredients

For the shortcrust pastry

For the filling

For the optional icing


Method

  1. To make the pastry, measure the flour into a bowl and rub in the butter with your fingertips until the mixture resembles fine breadcrumbs. Add the water, mixing to form a soft dough. Or just throw the butter and flour into a food processor, blitz it, and add water until you get a soft dough. Whichever.
  2. Roll out the dough on a lightly floured work surface and use to line a 20cm/8in flan tin. Leave in the fridge to chill for 30 minutes.
  3. Preheat the oven to 200C/400F/Gas 6 (180C fan).
  4. Line the pastry case with foil and fill with baking beans. Bake blind for about 15 minutes, then remove the beans and foil and cook for a further five minutes to dry out the base.
  5. For the filing, spread the base of the pastry generously with raspberry jam.
  6. Melt the butter in a pan (or in a chipped stoneware teacup in the microwave), take off the heat and then stir into the sugar. Add ground almonds, egg and almond extract. Pour onto the pastry and sprinkle over the flaked almonds.
  7. Bake for about 35 minutes. If the almonds seem to be browning too quickly, cover the tart loosely with foil to prevent them burning.
  8. Optional : Meanwhile, sift the icing sugar into a bowl. Stir in cold water and transfer to a piping bag.
  9. Once you have removed the tart from the oven, pipe the icing over the top, giving an informal zig zag effect.

Tuesday 17 May 2016

Lime Bars


So yeah...lime bars...Fairly simple, which is just as well, because I made them on the wrong day.

Here I was, trying to be the smug mother again baking for the cricket crew. I made the mistake of listening to my husband when he told me that cricket was on Monday again, so I went ahead and made a batch of these. As they were cycling over, I even found a sturdy container, packed them well, and made him get some bungees to strap it to the panier rack. Cricket was to begin at 5:45, so I sent them on their bikes at half past, texting a friend to watch out for Michael if she wanted any of tonight's treat.

At quarter to six I got a call. "So...cricket isn't on...but these bars will keep, right? You can just put them in the fridge and give them out on Wednesday?"

I thought for a moment, and said "Err, I can just make something different then. In the meantime, go to X's house and drop some off there, and then go to Y's house and give some to her, cause I was talking about this recipe with her today as well."

So they set off on their deliveries, and we got a bit more peace and quiet at home.

In the U.S., lemon bars are fairly standard bake sale and coffee shop fayre, but you don't see them here much. This is just a slightly sexed up version of them, using lime instead of lemon, and adding a glaze layer on the top.

A food processor in your life will make the first step VERY easy: just stick some flour, icing/powdered sugar, salt, and butter into a food processor until it resembles breadcrumbs and dump it into your lined 9X13 pan. If you don't have one this size, think about getting one if you want to master a lot of American recipes. Or half the recipe and do it in a square 8 inch pan.


I used a small nutella jar that I now use as a drinking glass to stamp it down a bit.


Then baked it for 10 minutes.


I then poured a simple mixture of limes (zest and juice), eggs, sugar, flour, and baking powder on top, which I had managed to put together during the 10 minutes the base was in the oven, even while managing a 3 year old who wanted a chocolate donut, a request he kept repeating over and over and over and over...


I didn't have any, and told him I didn't intend to get any, so he took my ipad and took a photo of what my kitchen really looks like when I don't zoom in to edit out all the crap everywhere.


The pan went back in the oven for another 25 minutes or so, at which point it came out looking like this.


Once it had cooled a bit I put a mixture of limes (juice and zest) and icing/powdered sugar on as a glaze and let it set while I read about Berenstein Bears on Vacation, at the Doctor, on their Moving Day, with Trucks, Going to School...and then about Fancy Nancy and her Butterfly Birthday.


The bars were now ready for slicing, so the books were abondoned. One day, I might actually learn to make even squares when slicing. Not today.


Then into the box they went on their city adventure. Here they are being lovingly packed in some vintage tupperware which doesn't crack or break when you drop it. This is important for me, as I am really good at breaking stuff. I made the mistake of splurging around Christmas-time on a modern 2 tiered cupcake carrier and broke it the second time I used it. Vintage tupperware, on the other hand was made to last, so we are good pals and shall remain so for a while I suspect.


I'll post the recipe below but here is the link. Soon it looks as if I shall have to focus my efforts on  copying and pasting a lot from the BBC recipe site as it is being shut down!!! Scary biscuits!

"A different take on the lemon bars we all love. I actually prefer them to lemon. This is my favorite bar cookie and I'm asked to bring it when going to a potluck or picnic. The recipe says it serves 36, but you can't eat just one of these delicious, tangy lime bars. You can omit the glaze and sprinkle with powdered sugar if that's your preference."

Ingredients

  • 2 cups all-purpose flour
  • 1/2 cup confectioners' sugar
  • 1/2 teaspoon salt
  • 1 cup butter
  • 4 eggs
  • 1/3 cup lime juice
  • 1/4 cup all-purpose flour

  • 2 cups white sugar
  • 2 teaspoons grated lime peel, or more to taste
  • 1/2 teaspoon baking powder
  • 1 1/2 cups confectioners' sugar
  • 2 tablespoons lime juice
  • 1 teaspoon grated lime peel (optional)

Directions

  1. Preheat oven to 350 degrees F (180 degrees C). Grease a 9X13-inch baking dish.
  2. Mix 2 cups flour, 1/2 cup confectioners' sugar, and salt in a bowl; cut in butter with a pastry cutter until crust mixture resembles crumbs. Pat crust evenly into bottom of the prepared baking dish.
  3. Bake crust in the preheated oven for 10 minutes.
  4. Whisk eggs, 1/3 cup lime juice, 1/4 cup flour, white sugar, 2 teaspoons lime peel, baking powder; pour over the crust.
  5. Return baking dish to oven; bake until filling is set, about 25 minutes. Cool thoroughly.
  6. Whisk 1 1/2 cup confectioners' sugar, 1 tablespoon lime juice, and 1 teaspoon grated lime peel to make a smooth glaze; spread evenly over cooled lime bars. Let glaze set before cutting