Monday 30 May 2016

Ginger and Date Scones


Scone. How do you pronounce that word? Here, it is generally said to be "skon", unless you are talking about the place itself, in which case it is "Skoon". If you are reading this in North America, you probably think it rhymes with stone. 

No, it doesn't. Stop doing that. 

Scones (especially their pronunciation) have been a bit of a thing for a long time in our family. My grandmother's consistently rose like clouds when she cooked them at home in Australia. Unfortunately, when she tried the exact same recipe in North America, the flour produced hot, buttery batches of rocks - fresh baked disappointment - due to the local flour's refusal to cooperate. But the British delicacy didn't have to be homemade; every time we went on a trip to the beach town of Lorne, we could count on visiting the same tea shop overlooking the ocean.  There my grandmother would carefully scrutinise all the menu choices before choosing the same thing time and time again: a cream tea. I think she was of the jam then cream school, but I won't swear to it.

We made the odd batch of scones at home growing up using the ever reliable Bisquick, but it wasn't until I moved to Scotland that I made them from scratch. Here, so many claim to make the BEST scones that I was a bit wary of trying to make them myself. Eventually I conquered my fear, telling myself  at the end of the day, anything straight out of the oven served smeared with melting butter and generous dollops of jam is going to be good, no matter how incompetent a cook you are.

A few years ago my mum went on a visit to Australia and raved about a particular variety of scone: ginger and date. She feasted on them several times during her stay, and being somewhat of a ginger fanatic, recommended I also try making them. She suggested this on a regular basis for quite some time...

"So, have you tried making ginger and date scones?"
"I miss those scones in Australia...you know, the ginger and date ones? Have you made them?"
"Did you find a good recipe for ginger and date scones yet??"
"Oh...you're baking? Are you making scones? With ginger? And dates?"

Still, I can't say I was ever really tempted to make them until this past week. I was at home, awaiting her and her companion's arrival while looking after a poorly 3-year-old, trying to think of something simple I could make with the ingredients I had on hand. Years ago, my mother and I had walked the West Highland Way together, and she had been particularly delighted by Rose Cottage, a B&B that had greeted us with fresh scones and a pot of tea. I looked to recreate that moment (scones after a trek across the ocean rather than following a 14 mile stroll) and then realised that I had both candied ginger and dates in my possession, so perhaps it was time to try the variety my mother had requested I try so many times. The one ingredient in the recipe I did not possess was buttermilk, but that was easily remedied by adding lemon juice to milk and waiting for the mixture to magically transform. 

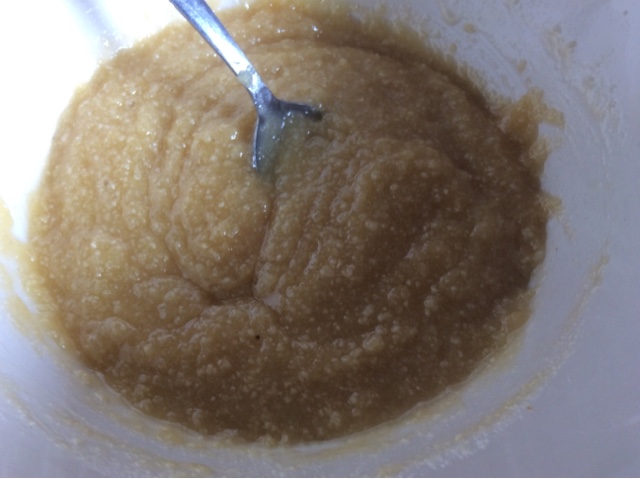
The rest was just as simple: dry ingredients and chopped butter into the food processor, blitz, dump into bowl & add buttermilk to bring together, mixing as little as possible, fold in dates and chopped ginger. Put mounds onto greaseproof paper, then sprinkle coarse, demerara sugar on top and bake until nicely browned. Brew tea and wait for mother, trying one for quality control while waiting. 

So yes, mother, I have made them. And yes, they were nice. Thank you.

The link is here, but the recipe is also below:

INGREDIENTS

    • 2 1/4 cups all-purpose flour
    • 1/4 cup brown sugar, packed
    • 1 1/2 teaspoons baking powder
    • 1/2 teaspoon baking soda
    • 1/4 teaspoon salt
    • 1/2 cup unsalted butter, cold, cut into 8 chunks
    • 1 cup buttermilk (just under a cup of milk, add a Tbsp of lemon juice, stir, then let sit for 10 minutes)
    • 3/4 cup dates, chopped
    • 1/4 cup crystallized ginger, chopped
    • 1 tablespoon demerara sugar 

DIRECTIONS

  1. Preheat oven to 425 degrees F.
  2. In medium bowl, whisk together flour, sugar, baking powder, baking soda & salt.
  3. With pastry blender cut in the cold butter until mixture looks like fine crumbs (or blitz in a food processor)
  4. Stir in buttermilk until dough forms a ball, then stir in dates & ginger.
  5. On an ungreased baking sheet & using a 1/3 cup measure, drop dough 1 inch apart, then sprinkle with sugar.
  6. Bake 12 to 15 minutes or until golden brown


Saturday 28 May 2016

Bakewell Tart

The panic continues, folks.

BBC Food will be coming to an end, and with it, its searchable index of 11000 recipes, a resource that has been invaluable to me and countless others. Whenever trying something new, it is the first site I tend to go to, as its recipes are reliable, its comments useful.

But it don't make no money, so it gots to go. Before it does, I shall be building up an arsenal of recipes such as the one for this.


Don't be distracted by the stars, it is the tart we made here. This was it competing with another mum's cupcakes for the attention of 8 year old boys. The cupcakes won, dammit. Had it been the Sunday church crowd, it would have been a different story, but this time, I failed miserably in providing the most tempting cake on offer.

As far as tarts go, this one is a pretty simple one. The base pastry is just butter whizzed up in a food processor with flour, plus enough water to bind it together, then rolled out for my removeable base tart tin. Naturally, I made sure it was flawless.


It chilled in the fridge for a while  (to prevent too much shrinkage when baking) then on went some scrunched up baking parchment followed by my baking beans.


Baking parchment always feels to me like the budget cousin of waxed paper. Can you still get that anywhere? I'd like some just for wrapping sandwiches to bring to work, to make it look like I've been to some fancy artesan deli instead of using Lidl's finest pb&j.

Anywhoo, while blind baking the pastry, I put together a mixture that this photo makes look pretty revolting.


It was ground almonds, melted butter, sugar, almond extract and eggs.

The pastry came out, and you can see a wee patch at the lower edge where a hole had appeared.


In went a whole bunch of raspberry jam


Then my youngest son was kind enough to take this "action shot" while I explained that no, we weren't making chocolate chip cookies.


Oh, and this is me. Backlighting is awesome. My hat is so I don't get hair in your cake. You're welcome.


Then on went the almond mixture.


And then sliced almonds were scattered on top.


Back in the oven it went. I have to put it on a tray for 2 reasons:

1) It's a lot easier to put in and out of the oven

2) I always forget it's a removeable base, so inevitably if I DON'T use a tray, I grab the edges, then manage to shove the bottom part of the pan up on one side and not the other, smashing the tart into irrecoverable ugliness. So yeah, use a tray.


You may have noticed I didn't trim the edges earlier. The British Bake off hosts seem to think you should trim the edges after it's cooked, while it's still warm, to prevent the sides sliding into the bottom of the dish. You also can trim it more neatly. I do everything the judges say, so I waited until now to cut off the overhanging pastry.


Ok, so I didn't add a glazed icing to this tart like Mary Berry says you should. I don't think it needs it. It looks pretty enough as it is, here seen in its vintage yellow tupperware to be safe on its mile long journey.


And here, sliced on site next to WAY popular star buns. Oh well, at least I brought it on the right day this time.


The link to the recipe (while it still exists) is here, otherwise you'll find my usual styling genius of copy and paste with the original recipe below:


Ingredients

For the shortcrust pastry

For the filling

For the optional icing


Method

  1. To make the pastry, measure the flour into a bowl and rub in the butter with your fingertips until the mixture resembles fine breadcrumbs. Add the water, mixing to form a soft dough. Or just throw the butter and flour into a food processor, blitz it, and add water until you get a soft dough. Whichever.
  2. Roll out the dough on a lightly floured work surface and use to line a 20cm/8in flan tin. Leave in the fridge to chill for 30 minutes.
  3. Preheat the oven to 200C/400F/Gas 6 (180C fan).
  4. Line the pastry case with foil and fill with baking beans. Bake blind for about 15 minutes, then remove the beans and foil and cook for a further five minutes to dry out the base.
  5. For the filing, spread the base of the pastry generously with raspberry jam.
  6. Melt the butter in a pan (or in a chipped stoneware teacup in the microwave), take off the heat and then stir into the sugar. Add ground almonds, egg and almond extract. Pour onto the pastry and sprinkle over the flaked almonds.
  7. Bake for about 35 minutes. If the almonds seem to be browning too quickly, cover the tart loosely with foil to prevent them burning.
  8. Optional : Meanwhile, sift the icing sugar into a bowl. Stir in cold water and transfer to a piping bag.
  9. Once you have removed the tart from the oven, pipe the icing over the top, giving an informal zig zag effect.

Tuesday 17 May 2016

Lime Bars


So yeah...lime bars...Fairly simple, which is just as well, because I made them on the wrong day.

Here I was, trying to be the smug mother again baking for the cricket crew. I made the mistake of listening to my husband when he told me that cricket was on Monday again, so I went ahead and made a batch of these. As they were cycling over, I even found a sturdy container, packed them well, and made him get some bungees to strap it to the panier rack. Cricket was to begin at 5:45, so I sent them on their bikes at half past, texting a friend to watch out for Michael if she wanted any of tonight's treat.

At quarter to six I got a call. "So...cricket isn't on...but these bars will keep, right? You can just put them in the fridge and give them out on Wednesday?"

I thought for a moment, and said "Err, I can just make something different then. In the meantime, go to X's house and drop some off there, and then go to Y's house and give some to her, cause I was talking about this recipe with her today as well."

So they set off on their deliveries, and we got a bit more peace and quiet at home.

In the U.S., lemon bars are fairly standard bake sale and coffee shop fayre, but you don't see them here much. This is just a slightly sexed up version of them, using lime instead of lemon, and adding a glaze layer on the top.

A food processor in your life will make the first step VERY easy: just stick some flour, icing/powdered sugar, salt, and butter into a food processor until it resembles breadcrumbs and dump it into your lined 9X13 pan. If you don't have one this size, think about getting one if you want to master a lot of American recipes. Or half the recipe and do it in a square 8 inch pan.


I used a small nutella jar that I now use as a drinking glass to stamp it down a bit.


Then baked it for 10 minutes.


I then poured a simple mixture of limes (zest and juice), eggs, sugar, flour, and baking powder on top, which I had managed to put together during the 10 minutes the base was in the oven, even while managing a 3 year old who wanted a chocolate donut, a request he kept repeating over and over and over and over...


I didn't have any, and told him I didn't intend to get any, so he took my ipad and took a photo of what my kitchen really looks like when I don't zoom in to edit out all the crap everywhere.


The pan went back in the oven for another 25 minutes or so, at which point it came out looking like this.


Once it had cooled a bit I put a mixture of limes (juice and zest) and icing/powdered sugar on as a glaze and let it set while I read about Berenstein Bears on Vacation, at the Doctor, on their Moving Day, with Trucks, Going to School...and then about Fancy Nancy and her Butterfly Birthday.


The bars were now ready for slicing, so the books were abondoned. One day, I might actually learn to make even squares when slicing. Not today.


Then into the box they went on their city adventure. Here they are being lovingly packed in some vintage tupperware which doesn't crack or break when you drop it. This is important for me, as I am really good at breaking stuff. I made the mistake of splurging around Christmas-time on a modern 2 tiered cupcake carrier and broke it the second time I used it. Vintage tupperware, on the other hand was made to last, so we are good pals and shall remain so for a while I suspect.


I'll post the recipe below but here is the link. Soon it looks as if I shall have to focus my efforts on  copying and pasting a lot from the BBC recipe site as it is being shut down!!! Scary biscuits!

"A different take on the lemon bars we all love. I actually prefer them to lemon. This is my favorite bar cookie and I'm asked to bring it when going to a potluck or picnic. The recipe says it serves 36, but you can't eat just one of these delicious, tangy lime bars. You can omit the glaze and sprinkle with powdered sugar if that's your preference."

Ingredients

  • 2 cups all-purpose flour
  • 1/2 cup confectioners' sugar
  • 1/2 teaspoon salt
  • 1 cup butter
  • 4 eggs
  • 1/3 cup lime juice
  • 1/4 cup all-purpose flour

  • 2 cups white sugar
  • 2 teaspoons grated lime peel, or more to taste
  • 1/2 teaspoon baking powder
  • 1 1/2 cups confectioners' sugar
  • 2 tablespoons lime juice
  • 1 teaspoon grated lime peel (optional)

Directions

  1. Preheat oven to 350 degrees F (180 degrees C). Grease a 9X13-inch baking dish.
  2. Mix 2 cups flour, 1/2 cup confectioners' sugar, and salt in a bowl; cut in butter with a pastry cutter until crust mixture resembles crumbs. Pat crust evenly into bottom of the prepared baking dish.
  3. Bake crust in the preheated oven for 10 minutes.
  4. Whisk eggs, 1/3 cup lime juice, 1/4 cup flour, white sugar, 2 teaspoons lime peel, baking powder; pour over the crust.
  5. Return baking dish to oven; bake until filling is set, about 25 minutes. Cool thoroughly.
  6. Whisk 1 1/2 cup confectioners' sugar, 1 tablespoon lime juice, and 1 teaspoon grated lime peel to make a smooth glaze; spread evenly over cooled lime bars. Let glaze set before cutting

Saturday 14 May 2016

Rhubarb and Custard Tart with Butter Crumble


The closest I ever came to running an allotment plot was directly after I read Barbara Kingsolver's Animal, Vegetable, Miracle, in which she and her family attempted to eat only locally grown food for a year. I signed our family up for a local plot...and was told the waiting list was taking on average 7-8 years. Recently (about 7 years after signing up) we were sent a letter asking us to contact them if we were still interested...I didn't respond.

I mean, I like the idea of gardening and growing my own food. I just don't actually like spending my time doing it. Good weather is so rare here, it seems such a waste to spend it on an allotment when I could spend that time in a park instead and amble down to buy locally grown produce at the farmers' market.

...Or simply cozy up to friends who sweat over their own plots. And friends like these always gift you some of this stuff:


Rhubarb. Glorious, wonderful, heavenly rhubarb. Barbara Kingsolver has a chapter in her book when her family set off on their first week of local eating at the very beginning of spring. Her daughter has one request from the market: fresh fruit. So early in the season, they went with little confidence to their small gathering of farmers' stalls. They had given up hope until they found our cold weather friend: RHUBARB! Admittedly, much like tomatoes are fruit, rhubarb is a vegetable and needs a fair amount of sugar and stewing to make it palatable, but what a flavour it is. And once you have a plant which has established itself, you need do little to maintain it apart from cut it regularly, so it is a lazy gardener's dream, constantly producing a steady stream of stalks, so I am told

One of the mums at my children's school came to the playround the other day armed with four shopping bags of freshly hacked stalks, determined to give all the cuttings away in order to save her family from a plant threatening to take over the back of her house. Three bundles were given away to mums who had previously put in requests, and as she threateningly swung the last sack towards the remaining crowd I did not hesitate to stake my claim to it, quickly snatching the parcel and cradling it carefully for the two mile journey home, pondering what it would become. A crumble was the obvious choice, but I wanted to incorporate a custard element somehow, as well as some orange flavour that others recommended, so I searched and found a recipe for rhubarb & custard pie with butter crumble.

But I'm going to call it a tart, because that sounds fancier and more continental. 

I started by making some pastry from Jamie Oliver recipe. I later realised this was a mistake, as it's a fairly short dough that tears easily, and with a custard pie you really need a leakproof base. Live and learn. But yeah, I put a bit of clementine zest in (oops, no oranges in stock) which was a bit pointless as we couldn't taste them anyway, and blind baked it with my trusty jar of pulses and beans as pie weights. Then in went the rhubarb which I had briefly cooked in a pan with some sugar until the sugar dissolved.


On top of this I poured my custard mixture. The recipe called for single cream, but I didn't have any of that either, so I used the last bit of double cream I had and topped it up with whole milk and a touch of vanilla paste just because vanilla makes everything better.


I baked it until the custard was just starting to set (and the crust just starting to burn).


And then on went the butter crumble mixture which I had whizzed together in the food processor before adding sliced almonds as an afterthought.


Back in it went to let the crumble crisp up and to burn the edges of the pastry.


So yeah...I trimmed off the more, er, caramelised edges.


Then on a plate it went to cool. The recipe said to eat warm, but then I read the comments section (it's ok to read comments sections on recipes) and everyone was all "HELL TO THE NAW SHOULD YOU EAT THIS HOT! IT NEEDS TO COOL TO MAKE THAT CUSTARD SET, YO! "

Well, they didn't say it quite like that, but they all agreed that essentially you need to let it cool, as it keeps cooking as it cools and makes it less of a gloopy mess when you slice into it.


So eventually we did slice into it, and the comments people were right.


It needed that time! Mary Berry wouldn't have liked the soggy bottom, but it was still tasty. 

Now I know what you are thinking: Why not just make rhubarb custard and pour some fresh custard on it? Isn't that pretty much the same thing? Plus a bit of pastry, maybe?

BECAUSE I LIKE THINGS FANCY, OK?

But yeah, I just stewed the rest of the rhubarb and had it on some yogurt, and that was pretty tasty too. Rhubarb is awesome like that. 

Recipe is here, but I also know how to copy and paste, so it's below too:

Rhubarb & custard TART with butter crumble

  • 350g rhubarb
  • 100g golden caster sugar
  • 350g sweet shortcrust pastry
  • 1 large egg and 1 egg yolk
  • 1 tsp vanilla extract
  • 1 tbsp plain flour
  • 284ml carton single cream

For the topping

  • 50g butter , melted
  • 50g demerara sugar
  • 50g porridge oats
  • ½ tsp ground ginger
  • Cut the rhubarb into bite-size pieces, then put them in a frying pan with half the sugar and warm through just until the sugar dissolves. Immediately tip the rhubarb into a bowl with the juices and leave to cool. Preheat the oven to 180C/gas 4/fan 160C.
  • Roll out the pastry quite thinly and use to line a deep, loose-based 24cm fluted flan tin. Line with greaseproof paper and baking beans and bake for about 20 minutes until the pastry is pale golden and no longer raw.
  • Beat together the egg and egg yolk, vanilla extract, remaining caster sugar and the flour. Gradually whisk in the cream with any juice from the rhubarb (you should have a tablespoonful or two). Now spoon the rhubarb into the prepared pastry case and pour the cream mixture over.
  • Turn the oven temperature up to 200C/gas 6/ fan 180C and bake for about 20 minutes, or until the custard is very lightly set and there is a thin skin on the top.
  • Mix together all the topping ingredients and spoon evenly over the pie. Return it to the oven for a further 15 minutes or until the crumble is golden and the custard set with just a little wobble. The top of the pie may have risen and cracked when you take it from the oven but don’t worry as it will settle back again on cooling. COOL COMPLETELY THEN SERVE

Wednesday 11 May 2016

Lemon Raspberry Bundt Cake

(For those who want to skip straight to a copy of the recipe, just go here and use raspberries instead of lemons)

Cricket season has arrived in Edinburgh. What this means is that once a week I take my eldest over to our local grounds for practice. With the sun shining, the children all in their cricket whites, and just the sound of bats hitting their targets, I feel both excited and guilty about being part of it. The pitch is situated in one of the more affluent parts of town, overlooked by a grand mansion with multiple bay windows and a vast garden extending down a steep slope. The views from the pitch extend over to Arthur's Seat and Salisbury Crags and are magnificent in the evening light. Outside are parked family Mercs, Audis, and Range Rovers, and inside the walls lean custom made bicycles that have secure garage storage when at home. Meanwhile the clubhouse itself is just a glorified shed and the club members are prodominantly middle class folk who lean towards the upper end of the spectrum, many obviously eager to climb up, up, up to the top 1%. The club do not discriminate in their members; places are awarded on a first come, first serve basis, but not many working class folk are in the area. So yeah, it all feels just a tad elitist, just not as blatant as an invitation only country club.

I don't have a new coat, a fancy bike, or a flashy car to show off, so instead I bring culinary creations to prove my worth. You see, part of the charm of the place is a folding table set up at the side, quietly selling tea, coffee, juice, and homemade cakes. Parents nibble delicacies and sip tea on wooden benches as they watch their sons practice (yes, all boys, somehow no girls have expressed interest in joining our local club), then at the end a swarm of young men surround the table to clear it of every last crumb, thrusting their 50 pence pieces at whichever overwhelmed mother has been pulled into duty that week. I have carefully avoided the baking table's rota, telling myself if I just bring cake every week I will have fulfilled my duties as a cricket mother without having to endure excessive smalltalk.

But what to bring? Last week I delivered some chocolate chip cookies which disappeared quickly, but I discovered the other day that somehow I'd managed to hide 5 different bags of raspberries in my freezer.  This meant whatever I made this week would have to be dotted with these berries in order to clear out space for the two monstrous bags of Costco chicken nuggets I had more recently shoved inside (don't judge). Aiming for a show-off factor, I pulled down my fleur de lis bundt tin. All it takes is a lot of oiling (hello, cooking spray, where were you when I needed you this week) a lot of cooling, and some tupperware to transport it and BOOM, you've got yourself a fancy cake. It can taste like sawdust, but people will still ooh and aah when they see it.

I only grabbed my i-device once I'd put it in the tin, as I was in a wee bit of a rush, but I just loved the look of the batter so much I had to take a photo. Berries make things look pretty.

,

Then in it went. As the berries were still frozen, and I had limited time, I cranked up the heat 30 degrees higher (Celcius) than the recipe said and chanced my luck. After an hour, it looked like this, which was good because the last time I made it at the lower temp it took over an hour and a half to cook through.


A few hours cooling, then I turned it out onto some parchment paper. A couple parts had stuck, but not too disastrously.


Then a quick stirring of lemon juice and icing sugar for a runny glaze. "IT'S DRIPPING!!!" my three year old son warned me. I reassured him that I meant for it to happen that way, but he just eyed me with great skepticism.


For the record, this is what it looked last time I made it with the slower cooking time and temp...and a more runny glaze:

Off it went to cricket. My pride climbed to unhealthy heights when I saw it was the cake that all the adults chose to consume with their evening cuppa. I don't have a photo of the what it looks like when you slice into it, but it really is inviting: golden cake dotted with fresh red raspberries. My cake lady status was preserved.

The meticulously copied and pasted recipe is below

INGREDIENTS

dIRECTIONS

  1. Preheat oven to 325*. Grease and flour a 10 inch Bundt pan. Sift together the 2 ¼ cups of flour, baking soda and salt. Mix in the lemon zest and set aside.
  2. With an electric mixer, cream together the butter and sugar until light and fluffy. Beat in the eggs one at a time, then stir in 1 Tb. lemon juice. Alternate beating in the flour mixture and the yogurt, mixing just until incorporated.
  3. Toss the raspberries with the remaining ¼ cup of flour. Gently mix them into the batter.
  4. Pour the batter into the Bundt pan. Bake in the preheated oven for 60 minutes, or until a toothpick inserted into the center of the cake comes out clean.
  5. Allow to cool 10 minutes in the pan, then turn out onto a wire rack and cool completely. Once cooled whisk together the remaining 2 Tb. of lemon juice and the powdered sugar. Drizzle over the top of the cake.