Showing posts with label Almonds. Show all posts

Tuesday, 2 January 2018

Christmas Fruit Cake

Fruitcakes were a running joke in the comic strips of my American youth. They were portrayed as the unwanted gift, the oddly imperishable foodstuff that unpopular relatives offered when they came to visit. Once received, it would go deep to the back of the cupboard where the strange, dense block would remain buried until the following year, when the recipient could gift it upon some new enemy

It looks like a ceiling fixture as I forgot to flip it before uploading. Blogger hasn't updated its app, so this process is taking a bit longer these days.

My family, being of Australian origin, took some offence at these portrayals of this sacred celebratory food. My grandmother was proud of her fruitcake, making it for special occasions such as birthdays and weddings, decorating it with skill I could never possess (largely because the piping bag is my nemesis, and also because life is too short to draw lace onto a cake.) No slice was wasted; in fact, she once baked a birthday cake for her daughter-in-law's mother, but only if my mother would promise that a large portion of the cake would be taken back to America for her own son to eat. This was not requested as a favour, but instead given as an instruction not to be questioned, so after the party, under the critical eye of her family my mother dutifully wrapped the remaining cake in foil and clingfilm, packing the parcel in her bags to travel back across the Pacific Ocean where the cake was scoffed down in a matter of seconds. 

Now I live in the UK, where Christmas Cake usually means fruitcake, and traditional wedding cakes are studded with currants. Times are changing; most families prefer a chocolate yule log to a Christmas pudding, and a sponge to a fruitcake for their matrimonial vows. At our own wedding some 12 years ago, I made two separate cakes: a fruit cake for the Baby Boomers and beyond, a lemon sponge for the younger ones. While everyone still seems to enjoy a mince pie at Christmas, fewer insist on a slice of fruitcake, so it was mostly out of a sense of nostalgia that I decided to tackle one this year. 

According to tradition, one must begin the process in November at the latest, soaking your fruit in booze for days, weeks, even months before mixing it into your eggy batter. That just doesn't happen in my house. I don't really get in the mood to even being prepping things until mid-December, and by then it seems like a lost hope to attempt a cake according to these stern rules from years gone by.

But then recently I was speaking to a fellow baker who revealed her secret - she never makes her cake in advance! She may soak the fruit for a while, but overnight has served fine on many an occasion, and her cakes always go down a treat with guests and family alike. Right, I thought, this I can do.

So she passed me the recipe and I looked at the recipe versus what I had in my cupboards. I should add that it was New Year's Eve and I wasn't in the mood for going to the shops unnecessarily. So I made a few modifications: 

To soak
200g prunes apricots chopped
300g currants
100g glace cherries, chopped
150g dried figs dates, chopped
175ml stout the better part of a bottle of rank mass produced ale that someone brought over as a joke a couple months ago
Advertisement

For the cake
175g unsalted butter, softened
175g soft light brown sugar
4 large eggs
2 tbsp black treacle molasses

Zest of 1 orange
125g dark rye flour
50g plain flour  50g + 125g = 175g plain flour
2 tsp mixed spice pumpkin spice
1½ tsp baking powder
¼ tsp salt
75g blanched hazelnuts, finely chopped   Brazil nuts, chopped. Kind of. 
So yes, I changed about half of the ingredients. But the spirit of the recipe was still the same, surely?
Boozy fruit. I had to remove a dinosaur egg from this vessel before use. It's ok, the dinosaur has hatched.
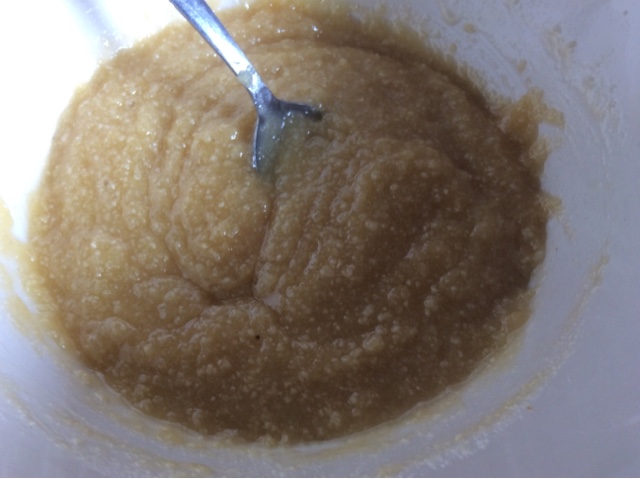
After assembling the fruit and soaking it overnight, it was time to start the great mix-up. Butter is never "room temperature" at our place, as our flat is rarely warm enough to bring anything to a soft temperature. I could have played a dangerous dance with the microwave, but instead decided to attack the brown sugar and butter with the pastry blender, then the wooden spoon.


After than, in went 4 eggs. There are always lots of warnings about how to prevent your mixture curdling at this point, but I never find them even remotely successful. I just let it curdle, knowing it will be just fine, as Mary Berry looks at me with disappointment and disapproval


One of my favourite "hacks" is greasing a spoon before putting in a sticky syrup like molasses or treacle. You just pour in a spoonful of oil into the spoon, then pour it back into the oil, then use the spoon for your choice of tar-like substance. Look how it just plops out of the spoon into the batter! Very satisfying, I tell you.


Then went in some zest, some dry ingredients, mix-y mix-y, choppy nutsy.


Then, the finale: the boozy fruit.

Dear God, sweet Jesus that is a lot of fruit.
At this point you lovingly gather your family round, making sure each family member takes the spoon and gives one stir to the mixture before pouring it into the tin.

Well, you think of it, but then you realise the children are being awfully quiet and good with their electronic babysitters, so you just ignore that step and bash it all together yourself. The tin for this, unlike most of my other tins, is silver rather than black in colour so as to conduct less heat, and this cake is treated to a double lining in an attempt to prevent any scorching. Why? Because this baby goes in the oven for no less than three and a half hours at a low heat, that's why. This ain't no rush job. I literally climbed up a mountain and returned back while this was in the oven and had time to spare.

It was a small mountain.


Now, halfway through, I did take it out of the oven and cover the top to prevent burning, but it seems that the fan in my oven decided to be particularly vicious, and my protective foil was ripped off and tossed around the oven. Naturally I didn't discover this until the damage had been done.


It didn't look too bad at first, but then it continued to cook outside the oven and I decided further measures needed to be taken.


If you look carefully, you'll see a knife slicing the top off the cake on the right. The thing was, even the scorched bit didn't actually taste burnt, AND I got to sample the cake pre-decoration. A win-win. So yes, always a good idea to trim cakes.

I then carefully whipped up a batch of marzipan.
Trust me, I made it once myself and it was not worth it in the slightest.

Then it was a simple matter of heating apricot jam, eating the heated jam, then heating more apricot jam and spreading it on the cake to help the marzipan stick.


Then it was time to roll out marzipan and pretend I knew how to decorate a cake


Just doing the ironing.

It's a ghost!!

I then sort of tried trimming it and decorating it


And this was the end result. I don't see any point in fondant or royal icing - they taste of nothing but sugar, so in the words of Prue Leith they simply aren't worth the calories.


My children keep looking at it, confused. "Why is there dough on the outside?" "When are you going to bake it?" "What IS that?" 

Obviously another great success. 


Ruby Tandoh’s easy fig and ale Christmas cake (yes, I know)

This is a last-minute affair compared with many Christmas cakes – but you should still soak the fruit overnight or at least for a few hours. It is still moist, dark and rich, and made in a fraction of the time it might usually take.

To soak
200g prunes, chopped
300g currants
100g glace cherries, chopped
150g dried figs, chopped
175ml stout
Advertisement
For the cake
175g unsalted butter, softened
175g soft light brown sugar
4 large eggs
2 tbsp black treacle
Zest of 1 orange
125g dark rye flour
50g plain flour
2 tsp mixed spice
1½ tsp baking powder
¼ tsp salt
75g blanched hazelnuts, finely chopped
1 The day before you make the cake, combine the fruit in a bowl and douse with the stout (a good porter or, at a push, brown ale will suffice, but the mellow, chocolatey depth of stout is best). Cover the bowl with clingfilm and leave overnight – or at least for a good few hours – until the fruit has absorbed most of the liquid.
2 The next day, when you’re ready to make the cake batter, preheat the oven to 150C/300F/gas mark 2, line a deep, 20cm round cake tin with baking parchment and wrap the outside in a couple of layers of foil to prevent the cake’s edge from drying during the long baking time.
3 Cream the butter and sugar together until completely smooth then, one by one, add the eggs. The mixture is likely to curdle a little at this point, but don’t panic: just add 2 tbsp or so of plain flour to smooth the mix. Stir in the treacle and zest. In a separate bowl, combine the flours, mixed spice, baking powder and salt. Add these dry ingredients to the wet mixture and stir until roughly combined.
4 Add the hazelnuts to the batter along with the soaked fruit mixture (including any stout left unabsorbed). Combine thoroughly. Spoon the mixture into the prepared tin and place on the middle shelf of the oven. Bake for 3½-4 hours, or until a small knife inserted into the centre of the cake emerges clean. If the top of the cake begins to darken too deeply during the baking time, just cover with foil.
5 Once baked, let the cake cool completely in its tin before decorating. It could take overnight to cool, but it’s crucial to wait until it’s stone cold before slicing. It will continue to firm, set and mellow as it approaches room temperature. Decorate it (or not) however you please.


Saturday, 28 May 2016

Bakewell Tart

The panic continues, folks.

BBC Food will be coming to an end, and with it, its searchable index of 11000 recipes, a resource that has been invaluable to me and countless others. Whenever trying something new, it is the first site I tend to go to, as its recipes are reliable, its comments useful.

But it don't make no money, so it gots to go. Before it does, I shall be building up an arsenal of recipes such as the one for this.


Don't be distracted by the stars, it is the tart we made here. This was it competing with another mum's cupcakes for the attention of 8 year old boys. The cupcakes won, dammit. Had it been the Sunday church crowd, it would have been a different story, but this time, I failed miserably in providing the most tempting cake on offer.

As far as tarts go, this one is a pretty simple one. The base pastry is just butter whizzed up in a food processor with flour, plus enough water to bind it together, then rolled out for my removeable base tart tin. Naturally, I made sure it was flawless.


It chilled in the fridge for a while  (to prevent too much shrinkage when baking) then on went some scrunched up baking parchment followed by my baking beans.


Baking parchment always feels to me like the budget cousin of waxed paper. Can you still get that anywhere? I'd like some just for wrapping sandwiches to bring to work, to make it look like I've been to some fancy artesan deli instead of using Lidl's finest pb&j.

Anywhoo, while blind baking the pastry, I put together a mixture that this photo makes look pretty revolting.


It was ground almonds, melted butter, sugar, almond extract and eggs.

The pastry came out, and you can see a wee patch at the lower edge where a hole had appeared.


In went a whole bunch of raspberry jam


Then my youngest son was kind enough to take this "action shot" while I explained that no, we weren't making chocolate chip cookies.


Oh, and this is me. Backlighting is awesome. My hat is so I don't get hair in your cake. You're welcome.


Then on went the almond mixture.


And then sliced almonds were scattered on top.


Back in the oven it went. I have to put it on a tray for 2 reasons:

1) It's a lot easier to put in and out of the oven

2) I always forget it's a removeable base, so inevitably if I DON'T use a tray, I grab the edges, then manage to shove the bottom part of the pan up on one side and not the other, smashing the tart into irrecoverable ugliness. So yeah, use a tray.


You may have noticed I didn't trim the edges earlier. The British Bake off hosts seem to think you should trim the edges after it's cooked, while it's still warm, to prevent the sides sliding into the bottom of the dish. You also can trim it more neatly. I do everything the judges say, so I waited until now to cut off the overhanging pastry.


Ok, so I didn't add a glazed icing to this tart like Mary Berry says you should. I don't think it needs it. It looks pretty enough as it is, here seen in its vintage yellow tupperware to be safe on its mile long journey.


And here, sliced on site next to WAY popular star buns. Oh well, at least I brought it on the right day this time.


The link to the recipe (while it still exists) is here, otherwise you'll find my usual styling genius of copy and paste with the original recipe below:


Ingredients

For the shortcrust pastry

For the filling

For the optional icing


Method

  1. To make the pastry, measure the flour into a bowl and rub in the butter with your fingertips until the mixture resembles fine breadcrumbs. Add the water, mixing to form a soft dough. Or just throw the butter and flour into a food processor, blitz it, and add water until you get a soft dough. Whichever.
  2. Roll out the dough on a lightly floured work surface and use to line a 20cm/8in flan tin. Leave in the fridge to chill for 30 minutes.
  3. Preheat the oven to 200C/400F/Gas 6 (180C fan).
  4. Line the pastry case with foil and fill with baking beans. Bake blind for about 15 minutes, then remove the beans and foil and cook for a further five minutes to dry out the base.
  5. For the filing, spread the base of the pastry generously with raspberry jam.
  6. Melt the butter in a pan (or in a chipped stoneware teacup in the microwave), take off the heat and then stir into the sugar. Add ground almonds, egg and almond extract. Pour onto the pastry and sprinkle over the flaked almonds.
  7. Bake for about 35 minutes. If the almonds seem to be browning too quickly, cover the tart loosely with foil to prevent them burning.
  8. Optional : Meanwhile, sift the icing sugar into a bowl. Stir in cold water and transfer to a piping bag.
  9. Once you have removed the tart from the oven, pipe the icing over the top, giving an informal zig zag effect.

Saturday, 24 October 2015

Apricot & Almond Tart

Last week, my family and I travelled over to Northern Ireland to visit some family. While there, my husband's cousin asked if I would be willing to make the pudding for the family's Sunday dinner while the others went to Sunday services, and I happily agreed to this plan.

When we entered the kitchen, a Jamie Oliver cookbook was thrust upon me with this Frangipane plum tart recipe.
A few pages earlier was the pastry recipe.

Now, I had expected something like, you know, a crumble, to throw together easily at a leasurely pace, not something that requires about 6 hours if you follow the recipe to the letter. On top of this, we were short of a few ingredients, we didn't have the right size tin, and there were no pie weights (or dried pulses) to hand for blind baking the pastry.

I managed to put some semblance of a tart together in the end (improvising with garden stones for pie weights) which was, er, rather "caramelized" on top, but it was eaten enthusiastically by the adults and even by a couple of adventurous children (my kids were more interested in ice cream, sadly). Pleasantly surprised by it, I resolved to go home and make a similar one, in a more suitably sized tin, and with apricots rather than plums as I love me some apricots.

Yesterday morning, I was faced with a question: should I clean up the flat while my two older kids were at school, or should I make a tart? A couple hours later, this emerged from the oven:


It looked a bit sad, really, so I looked at the recipe again and saw that it suggested an apricot jam glaze. I didn't have any of said ingredient at that moment, so off I went to get the kids, picking up jam on the way. After depositing kids at gymnastics with their father, I dashed home, quickly microwaved some jam, and spread it over the top:


Ahhhh...better. It was then shoved into a bag and brought into work, served with posh Sainsbury's custard. One colleague was disgusted when I said I'd brought apricot tart, but then she saw it and decided she had to try some...there were no crumbs left on her plate. So if nothing else, I convinced someone to eat apricots yesterday. Get your 5 a day every day, people. 

Jamie Oliver's fancy recipe page is here, but I've also copied and pasted below...and as I did this, I just realized I completely left out the oranges when I made this. Ooops: 


Apricot Tart 
from Jamie Oliver's Magazine

INGREDIENTS

• 500g sweet pastry
• 12 ripe apricots, halved and stones removed (or 2 x 400g tins apricot
halves, drained)
• 100g sugar, plus extra for sprinkling
• 4 tbsp apricot jam
• Crème fraîche or ice cream, to serve (optional)

Filling

• 300g ground almonds
• 225g sugar
• 225g butter, at room temperature
• 3 heaped tbsp flour
• 4 eggs
• Zest of 2 oranges, juice of 1
• 1 vanilla pod, seeds scraped out (or
1 tsp vanilla bean paste)
1. Preheat the oven to 180C/gas 4. Place the pastry on a floured surface and roll out to the thickness of a £1 coin. Lift over a rolling pin then unroll it onto a 28cm fluted tart tin. 
2. Gently ease the pastry into the tin, making sure it is pressed into the fluted edges. Trim the edges with a sharp knife and pierce the pastry base a few times with a fork. Chill in the fridge for 30 minutes – this will stop it shrinking when baked.
3. Meanwhile, blitz all the filling ingredients in a food processor so it forms a thick paste.
4. Once chilled, place the pastry in its tin on a baking tray and loosely cover with a sheet of baking paper, letting it hang over the edges. Fill with baking beans or rice.
5. If using fresh apricots, place them cut-side down in a large shallow pan with the sugar and 275ml of water, then cook over a medium heat for 3–4 minutes, or until slightly softened but not mushy. 
6. Bake the pastry case blind for 15 minutes, or until slightly coloured, then remove from the oven. Take out the baking paper and the baking beans or rice, and return the pastry to the oven for a further 10 minutes. Once it has a nice colour, leave it to cool slightly before adding the filling, then press in the apricots, cut-side up. Sprinkle with sugar and bake for 40–45 minutes, or until the filling has almost set and is coloured on top. 
7. Heat the jam in a small pan over a medium heat until melted. Brush over the tart to glaze, and leave to set. Once set, serve with crème fraîche or ice cream, if you like.


Sweet Pastry

Ingredients

  • 250 g plain flour , plus extra for dusting
  • 50 g icing sugar
  • 125 g good-quality unsalted cold butter , cut into small cubes
  • 1 orange , (optional)
  • 1 vanilla pod , halved and seeds scraped out (optional)
  • 1 large free-range egg , beaten
  • a splash of milk

Method

Everyone needs a good, basic pastry recipe, and this is one you can rely on. It’s easily adaptable if you want to add extra flavours like orange zest or vanilla – or even a pinch of nutmeg or cinnamon – and is really simple to knock up. If you have any pastry left over, simply wrap it in clingfilm and freeze it to use another time.

You can make your pastry like this by hand, or pulse it in a food processor. From a height, sieve your flour and icing sugar into a large mixing bowl. Using your fingertips, gently work the cubes of butter into the flour and sugar until the mixture resembles breadcrumbs. If using orange or vanilla for extra flavour, either finely grate in the zest of your orange or add the seeds from the vanilla pod and mix again.
Read more at http://www.jamieoliver.com/recipes/eggs-recipes/sweet-pastry/#TmktueWtSKiK2L57.99


Sweet and Strong Hare


On Saturday mornings, when all in my household are well and the weather is not too horrific, you will find me at our local farmers' market. It is a relatively small affair, with only some 30 or so stalls in total on a busy week, but there you can find items you really can't find easily in your local supermarket. The vegetables are ugly and obscure, the eggs don't just come from hens, and the hand crafted items are, well, very obviously hand crafted, shall we say.

The main draw for me is the meat. Puddledub bacon is the best bacon you'll find in Scotland. Really. And you can get great other cuts of really good meat at far cheaper prices than the butcher would offer for the same stuff. For example, the chickens I buy there I pay about £10 for (which is still pricey compared to a supermarket factory farmed bird, I know) but at the butcher's the same bird will cost you £25.

The first time I tried hare was when my husband brought home a bloody, skinned carcass from the farm where he worked and announced it would be dinner. I was skeptical, but he prepared jugged hare it was, indeed, very flavourful. Hares are far bigger than rabbits, so you really get a good amount of meat off of one of these violent creatures.

My preferred recipe now is one found in a book my mother sent me, an Italian cookbook named The Silver Spoon, which is some kind of Italian institution (or so its cover tells me). Its secret ingredient is chocolate - a small amount is all you need to add complexity and depth to the sauce enveloping the hare. You basically just slowly simmer the meat in some booze and stock until it is tender, then add sultanas and simmer some more, then some nuts, dark chocolate, vinegar and a tiny bit of sugar. Once that all comes together, it's easiest to just remove all the meat and put it in the sauce for simple serving, which we did alongside some roast potatoes and cauliflower in cheese sauce. No calories were counted in the creation of this meal.


For a good cauliflower cheese I recommend you try Nigella Lawson's recipe. For the next time you bag yourself a hare, try this recipe below:

Sweet and Strong Hare
from The Silver Spoon
serves 6-8

Ingredients:
2 Tbsp olive oil
25g butter
40g smoked bacon bits
1 hare, cut into pieces
2 Tbsp plain flour
175ml red wine
175ml meat stock
1 bay leaf
50g sultanas
25g pine nuts or sliced almonds
25g plain chocolate, grated
1 tsp white wine vinegar
t tsp sugar
salt and pepper

Method:
Heat the olive oil and butter in a pan, add the bacon bits and hare and cook over a medium heat, turning and stirring frequently, until the pieces of hare are browned all over. Season with salt and pepper, sprinkle with half the flour, mix well and cook for about 10 minutes. Pour in the wine and stock, add the bay leaf, lower the heat and simmer for about 1 1/2 hours. Meanwhile, put the sultanas in a bowl, add warm water to cover, and leave to soak for 15 minutes, then drain and squeeze out. Stir the sultanas and pine nuts into the pan and simmer for a further 30 minutes. Mix together the chocolate, the remaining flour, the vinegar, sugar and a pinch of salt in a bowl, then stir in 3-4 Tbsp water. Pour the mixture into the pan and bring just to the boil. Taste and add more salt if necessary. Serve the hare covered in this ancient chocolate sauce. 

Thursday, 9 July 2015

Raspberry Almond Scones

Scones are good, and these are awesome: almond raspberry scones. What's even better is that my local corner shop stocks packs of frozen raspberries in their small freezer section, meaning it is relatively easy to keep them in stock.


These photos have been sitting in my account for well over a month, so I suppose it is time I posted them. It is a fairly simple recipe. First go in flour, baking powder, sugar, and salt:


Then a pastry blender (or two knives) are used to cut the butter into the flour.


Then in goes milk or cream plus a few drops of almond extract


Then almonds


And lastly you mix in the berries.


The freezing berries make the dough go funny, and everything sticks to your hands as you form the dough in a big, weepy pink ball, but it's worth it. I just plop the ball on a floured baking sheet.


Then cut it up


Then separate the pieces so that they may grow and develop as independent scones.


Then bake them, ideally turning them through the baking so that they cook more evenly than this.


I think these ones went back in for a spell.


Then a simple glaze of icing sugar, almond extract, and milk goes on top via a handy dandy freezer bag with the tip cut off.


With the added almonds, now they are posh enough for Fancy Nancy.


I just love being fancy.


Here is the recipe, copied and pasted (or you could visit here), obviously from someone sponsored by Land O Lakes butter: 

Raspberry Almond Scones


Yield: 8 scones
Prep Time: 10 minutes
Cook Time: 15-18 minutes
Total Time: 30 minutes
Raspberry Almond Scones are perfect for breakfast, brunch, or tea time! Don't skip the almond glaze, it is heavenly!

ingredients:

2 cups all-purpose flour
1 tablespoon baking powder
3 tablespoons granulated sugar
1/2 teaspoon salt
6 tablespoons cold, unsalted Land O Lakes® Butter, cut into 1/4-inch cubes
1 cup heavy cream, plus 1 tablespoon, divided
1/4 teaspoon almond extract
1/3 cup sliced almonds
1 cup raspberries
For the Almond Glaze:
1 cup powdered sugar
4-5 tablespoons heavy cream or milk
1/2 teaspoon almond extract
1/4 cup sliced almonds, for garnish
Land O Lakes® Butter with Canola Oil, for serving, if desired

directions:

1. Preheat oven to 400 degrees F. Line a large baking sheet with parchment paper or a Silpat and set aside.
2. In a large bowl, whisk together flour, baking powder, sugar, and salt. Quickly cut in the butter, using your hands, two knives, or a pastry blender. Mix until mixture resembles coarse meal, with a feel larger butter lumps. Pour 1 cup of heavy cream and almond extract over the ingredients and stir with a spatula until dough begins to form. Don't over mix. Gently fold in sliced almonds and raspberries. The raspberries will get a little smashed, but that is ok. The scones will still be pretty:)
3. Transfer dough to a floured countertop and knead dough by hand just until it forms a ball. Form scones by patting the dough into a 3/4-inch thick circle. Cut the scones into even triangles. We got 8 scones.
4. Place scones on prepared baking sheet. Using a pastry brush, brush scones lightly with the additional heavy cream. Bake scones for 15-18 minutes, or until scones are light brown. Cool scones on a wire cooling rack.
5. While the scones are cooling, make the almond glaze. In a small bowl, whisk together powdered sugar, heavy cream or milk, and almond extract. Whisk until you reach desired consistency. Drizzle glaze over the scones. Top with additional sliced almonds. Serve!
Scones will keep in an air-tight container for up to 2-3 days, but they really are best eaten the day they are made.