Tuesday, 29 October 2013

Pumpkin Cheesecake

Well, today was a big day, people.  My baking got me invited to a party.  This cooking is opening doors, my friends.  Party doors with pumpkins on them.

Because it was a pumpkin tasting party!

I was under strict instructions only to make something if I wanted to.

Well, of course I wanted to.  I mean, who needs another excuse to cook pumpkin in October?  Not me, certainly.

I opted for pumpkin cheesecake, a dessert I now prefer over pumpkin pie.

So I got the essentials.  Out of frame is a huge bag of candied ginger that my mom sent with the request that it feature in a blog post.  Don't worry, you'll see it later on.

First I made the base - ginger nuts/snaps were pulverised in the food processor.


Then in went some pecans and crystallized ginger.  Sugar was supposed to go in too, oops.


Just a few pulses so there would still be lumps of it...


And then in went some melted butter.


I lightly pressed it into the tin.  My recipe then said to bake it, but I ignored the recipe and just set the assembled base aside.


On to the cheesecake filling.  I whipped up some cream cheese and added brown sugar, nutmeg, ginger, cloves, and cinnamon.


I never worry about a few specks of brown sugar showing up, as they'll just melt into nice sugary syrup within.


And in went some eggs too


Over the years, it has been tricky getting consistent supplies of this baby.  When I first moved here pureed pumpkins myself, which is a big, watery hassle (but admittedly turned out to be very tasty).  Then I found suppliers of the canned variety in out of the way places.  Then Libby's had a bad couple years of harvests and they actually limited the exports of this stuff, making it truly prized amongst us expats.

I'm happy to report it is a plentiful year for pumpkin, with Libby's now gracing multiple supermarket shelves and jack-o-lantern pumpkins a'plenty on the shelves too.


In goes the orange stuff


And into the tin it goes.


I stuck it in a water bath just to make sure it stayed smooth.  Just as well, as I forgot to turn the fan off on my oven so I cooked it at a higher heat than I intended.  And thankfully I have a habit of checking stuff when it is 3/4 of the way through what the directions indicate is the correct length of baking time.


So it came out looking like this.  It went into the fridge for a day and a half.


Then I added some whipped cream with a bit of vanilla, icing sugar, and ginger with a couple pieces of crystallized ginger.


And then I carried down the stairs in a vintage orange tupperware container and dropped it while stupidly trying to put gloves on, managing to smear whipped cream all over my coat in the process. A little voice inside my head had been trying to warn me it was a dumb idea, but who really listens to that voice, anyway?  I don't have a photo of the dented mess (thankfully at least it got on me and not the floor) as I didn't have anything with me that can take photos (my phone is an 8 year old Nokia) but I did still offer it to others and they ate it.  

WAIT, someone else took a photo with a fancy camera after its cosmetic repairs:


Try this recipe, you know you want to.

Pumpkin Cheesecake (adapted from TLC Cooking)

CRUST
1‑1/4cups gingersnap (ginger nuts in the UK) cookie crumbs 
1/3cup pecans, very finely chopped

handful of crystallized ginger
1/4cup butter, melted
FILLING

24 oz cream cheese
1cup packed light brown sugar
1teaspoon cinnamon
1/2teaspoon ground ginger
1/4teaspoon ground nutmeg

1/4 tsp ground cloves
2eggs
2egg yolks
1cup solid-pack pumpkin
PREPARATION:
  1. Preheat oven to 350°F. For crust, combine cookie crumbs, pecans, sugar and butter in medium bowl; mix well. Press crumb mixture evenly on bottom of ungreased 9-inch springform pan. 
  2. Meanwhile for filling, beat cream cheese in bowl with electric mixer at medium speed until fluffy. Add brown sugar, cinnamon, ginger and nutmeg; beat until well blended. Beat in eggs and egg yolks, one at a time, beating well after each addition. Beat in pumpkin.
  3. Pour mixture into crust.  Wrap outside of tin in foil to prevent leaks, then place in bain marie (a big tray filled with boiling water - it's easiest to put tray in oven, add tin, then pour boiling water around it)  Bake around 1 hour (start checking after 40 mins) or until edges are set but center is still moist, it should jiggle like jello in the middle. Turn off oven; let cheesecake stand in oven with door ajar 30 minutes. Transfer to wire rack. To prevent cracking, loosen edges of cake from rim of pan with thin metal spatula; cool completely.
  4. Cover; refrigerate at least 24 hours or up to 48 hours before serving
  5. Whip some double cream and when it forms soft peaks add a spoonful of icing sugar, a sprinkling of ground ginger and a dash of vanilla and stir into cream.  Pipe onto cheesecake just prior to serving.

Sunday, 27 October 2013

Sunday Roast Chicken, Root Veg, Stuffing, Cauliflower Cheese, and Gravy

The other week I read some mindless poll about the tradition of Sunday roasts in Britain.  Their traditions spans decades, but is apparently a dying one, as only a tiny percentage still make a roast on the Sabbath.  My older colleagues speak of how you could smell everyone's roasts on a Sunday stroll when they were growing up, but nowadays people are more likely to head down to Toby Carvery (which I hear is family friendly and tasty too).  After I trek over to the Farmers Market on a Saturday and come back laden with produce, I rarely have the energy to cook anything that day, so last night we opted for heating up some frozen veggie chilli I had made a couple weeks ago.

But when I opened the fridge today, this little guy was looking at me.


I do associate roast chicken with Sundays, certainly.  Quite frequently during my childhood my mother would roast 2 chickens on a Sunday, 1 to eat and the other to pick at during the week.  To this day my mother's face still lights up at the prospect of cold chicken sandwiches.  Nigella regularly praises the simple glory of a roast chicken, and who am I to argue with her?

The weather was projected to by awful (quite dramatically awful south of the border) so I decided it was a good day to settle in after church and prepare a feast that would last us at least a couple days.

First I prepped the chicken by sticking half a lemon in its cavity and smearing a bit of butter and olive oil onto the skin.  The oven is preheated to a low heat (160 or 170) and the bird gets a slow cooking over a couple of hours to ensure tender meat.  First, he goes in upside down.  This means the fat from the legs drips down into the breast to keep them juicy, rather than straight into the pan going to waste.  Clever, eh?


And onto the veggies!  Today I opted for parsnips, carrots, and sweet potatoes.  Just a bit of peeling and slicing and...


Voila!  Doused in oil, into the oven they go too.


That in itself is usually enough work for me, and I leave the meal at that.  But I had some stale bread and a few other essentials, so I decided to knock up some stuffing too.  I don't stuff the bird itself for two reasons:
1) The inside of the bird doesn't always get to a high enough temperature to cook the stuffing and prevent bacteria getting in
2) You don't get a crusty top on the stuffing if you cook it inside the bird

So gathering these things together..


I cooked some celery and onion in some butter and cut up the bread and toasted it a little to ensure it would absorb all the flavours.


Once the onion and celery were sufficiently softened, I added the bread cubes


Then in went parsley, sage, rosemary and thyme.  Just think of it as Simon and Garfunkel stuffing.  This is the most simple version of stuffing that we do, but mushrooms, sausage, and chestnuts are other regular guests in our stuffing.


Then in went an egg and some chicken stock from a cube.


And into the dish it went, going into the oven not to long before the chicken was due to come out.
On to the cauliflower cheese.

I never had tasted this dish until I came to the UK, and my version is less cheesy than most, being basically a white sauce with a bit of cheese in it rather than cheese with a bit of white sauce in it as most recipes I've read seem to be.  I think because this is the version I learned from watching my husband make it.

So you start with a roux of equal parts butter and flour


The oven beeped - time to flip the bird.  Oy!  Don't be rude.  You turn it over to brown the skin on the side people eat.  I usually end up tearing the skin somewhere when I do this, but others manage to do it gracefully.


Back to the white sauce.  Then keep adding milk and whisking until it's a bit too runny, then heat it to thicken it.  Sorry, that's the best I can do as I am not too scientific here.  That's probably why I mess it up a lot.


Once you add nutmeg it'll look like this.  Seasoning is good too, here.


Then take it off the heat and add some cheese (cheddar in this case).


Stir in the uncooked cauliflower.


And put it into a baking dish and into the oven until browned.  It'll be good, I promise.


Looks like the chicken is done. I check the juices run clear, but my mother likes to wiggle the legs.  I never know how they are supposed to wiggle, which is why I check the juices.


See, doesn't the cauliflower look goooood?  That's an onion gravy my husband made there, and the cooked stuffing.


Oh, and these guys.  They dried out a bit too much, but they were still good.


As you can see, there was a lot of food, so no running around cooking tomorrow night, we've got leftovers, hooray!!!!  I'll probably add something green tomorrow, though.  

Easy Almond Cake

Oh, Nigella, when your recipes fail I really do feel so let down by you and your promises of being a domestic deity.  I made your Easy Almond Cake, and it was not the eggy, almondy pound cake that I expected (and that I got the last time I made this recipe).

To be fair, she recommends a springform tube tin for this.  When I made it before it rose fabulously then in my other bundt tin (yes, I have 2 bundt tins thanks to one wonderful Christmas).  The other tin is black and less fancy in design, but the one I used on this occasion looks like this (along with the other ingredients).

More fancy, and more difficult to grease.  I thought I had done an ok job, but, well...

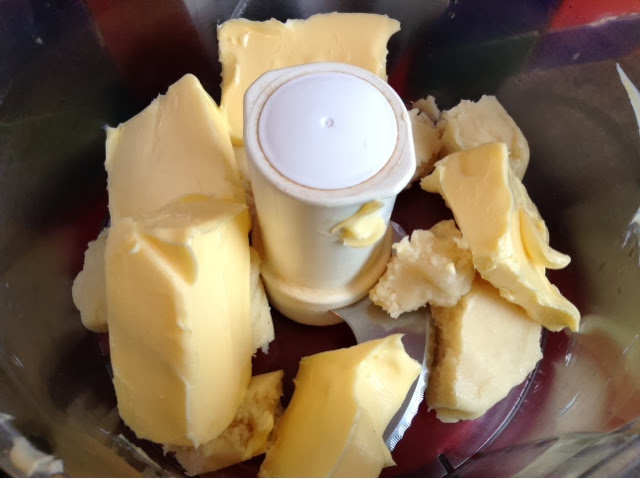
First, in any case, I blended some butter and marzipan.


Until it looked like this:

At which point I realised there should have been sugar in there too.  Oops.
That's better.  Then I added 6 eggs, some vanilla and almond extract:

Then some self raising flour and then it was ready for the tin.


An hour or so in the oven and out it came, looking glorious!


I let it cool down a long time to prevent it falling apart while turning it out.  I flipped it over and...nothing.  I ran a knife around the edge...nothing.  I banged it on the table over and over and over...nothing.  So eventually I just tried to get a slice out to see if once I did that I could get some leverage and sneakily put the slice back in once it was out.  No luck  - this baby was not coming out of that tin.  So instead, I just took slices out and stuck them in the tin for the after mass crowd.  Hmph.

Now why do you think no one was impressed by my offerings?
Still, I offer the recipe as it was good when I did it correctly.


Recipe for Easy Almond Cake

Ingredients
250g butter
250g marzipan
150g sugar
1/4 tsp almond essence
1/4 tsp vanilla
6 eggs
150g self raising flour

Method

You will need a 25cm / 10 inch springform tube pan or patterned ring mould, buttered and floured, and all ingredients must be room temperature.
  1. Preheat oven to 170ºC/gas mark 3/325ºF. Chop the butter and marzipan to make them easier to break down, and put them in the bowl of the food processor, fitted with the doublebladed knife, with the sugar. Process until combined and pretty well smooth. Add almond essence and vanilla extract, process again, then break the eggs one at a time through the funnel, processing again each time. Tip the flour down the funnel, processing yet again, and then pour the mixture into the prepared tin, scraping the sides and bottom with a rubber spatula.
  2. Bake for 50 minutes, but check from 40. Then, when the cake looks golden and cooked and a cake-tester or fine skewer (or a piece of spaghetti) comes out cleanish, remove from the oven and leave to cool in the tin before turning out. (This is when you will be feeling grateful if it's the Springform you're using.)

Saturday, 26 October 2013

Waffles

If you've ever read Cloudy with a Chance of Meatballs, you may recall that one of the first lines is "It was Saturday morning, pancake morning."  Since my children discovered this book, and adopted a nursery/school schedule, Saturday morning is official "pancake" morning.  I use quotations marks just around the word "pancake" because it is not always pancakes that we make.  Two times out of three, yes, but today it was waffles instead.

My daughter prefers waffles as she says they are easier to cut up with all the lines on them.  My son prefers pancakes as he insists he gets more nutella on them than he does on waffles.

I, myself, don't really have a set preference, but they do make me think of a friend in college who adored them and would stare at the college waffle iron in blissful wonder.

The recipe is not an amazing, life-altering gourmet one, but it is a simple and easy one, the first one offered in the waffles section of Joy of Cooking.  I hope my waffle mix at least measures up to the mystery mix served in jugs alongside the waffle irons in Burton, though I've not tasted Carleton's recently to assess it.  Nor can I guarantee mine measures up against the Waffle House batter, a chain I visited for the first time on my most recent Stateside trip.  All I can say is that we like our waffles.

First you combine flour, salt, sugar, and baking powder and whisk together.

Then 3 eggs, butter (however much or little you like, basically), milk, and a dash of vanilla are added.  I have tried it with buttermilk before, but I actually prefer regular milk in this recipe.


A quick whisking of wet and dry ingredients together.


Until you have a lumpy batter.  Lumpy is good.


Into the hot waffle iron it goes, and out it comes as this!  I like butter and maple syrup, but the kids prefer nutella.


Recipe to be added on later when I'm not so tired from children playing musical beds...

Right, refreshed and ready (thank you, clocks changing):

Recipe

Ingredients

245g plain flour
1 Tbsp baking powder
1 Tbsp sugar
1/2 tsp salt
3 eggs
60-225g butter, melted
375ml milk
1/2 tsp vanilla

Method

Preheat your waffle iron.  Sorry, you really do need a waffle iron or these just aren't going to happen.

Blearily measure out ingredients and whisk them together.  Take care not to over stir the mix.

Pour into the preheated waffle iron and cook until the iron tells you in some magical way (ours beeps) that the waffle is ready.  Cut it in half so that your squabbling children each get part of the first one.  Serve with whatever toppings you have or desire.  And try, if you can muster then energy, to clean the bowl straight afterwards as it will be a LOT easier to clean if you don't let it crust over while you drink tea and contemplate being productive while you in fact check facebook.